Thursday 30 May 2013

Snickerdoodles

We first encountered these American cookies in a shopping mall near Boston.  The ones we had were the size you come to expect from American cookies and half baked as they seem to like them.  I remember they were sprinkled with sugar and cinnamon.  This is an American recipe that I have translated into English measures but the cookies are smaller and are more like a light shortbread than a gooey cookie.  The recipe produces dome like cookies but my wife asked me to flatten the second tray to make flat ones, you can see both results in the picture.  These were as easy to make as the peanut butter cookies and you can literally just knock a batch up.

SNICKERDOODLES


  • 7oz plain flour
  • 1/2 tsp ground nutmeg
  • 3/4 tsp baking powder
  • 1/2 tsp salt
  • 4oz butter, softened
  • 3oz caster sugar + 2 tbsp
  • 1 egg
  • 1 tsp vanilla essence
  • 1 tbsp cinnamon
Preheat your oven to 180C/350F/Gas 4
Cream the butter and sugar till light and fluffy
Beat in the egg and vanilla essence
Fold in the flour, nutmeg, baking powder, salt and 3oz sugar
Mix the cinnamon and 2 tbsp of sugar together on a plate
Roll the dough into balls the size of a walnut then roll them in the sugar mix to coat
Place on a lightly greased baking tray well spaced and press down if desired
Bake for abut 15 minutes till golden brown
Leave to rest on their trays for a minute before transferring to a wire rack to cool
This recipe made 25 for me.

Peanut butter cookies

How long does it take to go to the shops to buy cookies when you fancy them?  If your butter is already at room temperature you can make these gorgeous little cookies in about twenty minutes.  I made them because one of my boys seems to be spending more time away from home than here and as he doesn't like peanuts then his younger brother can reap the benefits.  These will keep for several days in an airtight container and are soft like you expect an American cookie to be.

PEANUT BUTTER COOKIES


  • 100g/4oz butter, softened
  • 250g/9oz peanut butter (either)
  • 175g/6oz caster sugar
  • 1 egg
  • 1/2 tsp vanilla essence
  • 150g/5oz plain flour
  • 1 tsp baking powder


Preheat your oven to 180C/350F/Gas 4
Cream the butter, peanut butter and sugar together till light and smooth
Beat in the egg and vanilla essence
Fold in the flour and baking powder
Roll the mixture into little balls the size of a large grape and place well spaced onto a lightly greased baking tray
Use a fork to flatten the balls and make a criss cross pattern on top


Bake for 6-8 minutes till set but not hard
Remove from the oven and leave on the trays for 5 minutes before removing to a wire rack to cool
I made 30 from this recipe, you can make them as big or small as you like.

Wednesday 29 May 2013

Rhubarb and chilli jam

Here's a recipe I cut out of a magazine a couple of weeks ago.  Don't worry if you don't like rhubarb because you can't actually taste it.  That said it is delicious and so easy.  This is called jam and yes you could spread it on some crusty bread but its more like a smooth chutney and would go well with cheese and cold meat.  Just be warned it does have a kick behind the sweetness.  It makes about 400ml (14fl oz) or in my case two jam jars full.  Running your jam jars and lids through a hot wash in the dishwasher will get them clean enough.  The jam should store unopened in a cool dark place for up to three months.  Once opened refrigerate and eat within two weeks.

 
RHUBARB AND CHILLI JAM


  • 4 garlic cloves, crushed
  • 10cm (4") piece of fresh ginger, peeled and finely grated
  • 3 large fat red chillies, deseeded and roughly chopped
  • 225g/8oz tomatoes skinned and roughly chopped
  • 225g/8oz rhubarb, trimmed and chopped
  • 2 tsp vegetable stock powder
  • 100ml/3.5fl oz cider vinegar
  • 300g/10.5oz brown sugar
 
Put everything except the sugar and vinegar into a food processor and blend to a rough puree
 

Pour into a saucepan and stir in the vinegar and sugar till the latter has dissolved


Bring to the boil and simmer for 25 minutes till thick and glossy.  It may take longer, mine did.
Cool slightly then pour into your prepared jars and seal.  Enjoy when cold.


Sunday 26 May 2013

Chocolate and banana brownies

So what do you do with those overripe bananas at the end of the week?  You know, the ones that are a bit soft and starting to go black.  The thing about these is that they have the most intense flavour and easy to mash.  I usually make banana bread with them but this week I decided to dig out another old recipe that I've never made, Chocolate and Banana Brownies.  These are so easy and delicious and they stayed soft without going soggy for several days, in fact the chocolate flavour intensified as time went by.  This is an old recipe so no apologies to the metric minded amongst you I'm afraid.

CHOCOLATE AND BANANA BROWNIES


  • 7oz plain chocolate
  • 3oz butter
  • 2 eggs
  • 4oz plain flour
  • 8oz soft dark brown sugar
  • 2 ripe bananas, mashed
  • 1 tsp baking powder
  • 1/2 tbsp. salt
  • 1 tsp vanilla essence
 
Grease an 11" square or similar brownie tin and line the bottom
Preheat the oven to 180C/350F/Gas 4
Melt the butter and chocolate together in a saucepan over a low heat
Beat the eggs and sugar till light and fluffy then beat in the banana
Sieve the dry ingredients together and fold into the chocolate mixture
Add the vanilla essence
Bake for 30-40 minutes until set and looks like this
 

Allow to cool and cut into the size of brownie you like.


Monday 20 May 2013

Gooey butter cake

Here is a recipe for the best cake I had never heard of.  I was watching the new sci-fi show Defiance and the characters went underground to the city of St Louis which had been forced there by alien terraforming.  Whilst down there they talk about a restaurant where they used to go for Gooey Butter Cake.  Being a nosey sort I had to Google it immediately and discovered that this cake is a speciality of St Louis where there are two distinct varieties, one made by bakers using a yeast dough and the other a lazy home recipe using cake mix.  This is the baker's recipe converted into English and it tastes as good as it sounds.  The amounts of salt are correct, it gives a delicious salt sweet flavour.  The centre pieces of a lovely gooey topping and the edges are chewy, take your pick.

GOOEY BUTTER CAKE
 
 
For the cake
 
  • 3 tbsp. milk at room temperature
  • 2 tbsp. warm water
  • 1 3/4 tsp active dry yeast
  • 3oz/75g butter at room temperature
  • 3 tbsp. granulated sugar
  • 1 teaspoon of salt
  • 8oz/175g plain flour
 
For the topping
 
  • 3 tbsp. + 1 tsp of corn syrup (or any mild flavoured syrup like Gomme)
  • 2 tbsp. water
  • 2.5 tsp vanilla extract
  • 6oz/150g butter at room temperature
  • 12oz/300g granulated sugar
  • 1/2 tsp salt
  • 1 egg
  • 8oz/175g plain flour
In a small bowl mix the milk and warm water, add the yeast and stir gently till dissolved then let sit for five minutes
Which is long enough to cream the butter, sugar and salt till light and fluffy. 
Beat in the egg.
fold in the flour in three parts alternating with the yeast mixture
Increase the speed to medium and beat the dough till smooth
Press the dough into the base of an ungreased baking dish about 12x12" then cover with cling film and put in a warm place to rise for about three hours till doubled in size.


Preheat your oven to 350F/180C/Gas 4
In a small bowl whisk together the syrup, water and vanilla essence
Cream the butter, sugar and salt until light and fluffy. 
Beat in the egg
Fold in the flour in three portions alternating with the syrup mixture
Drop the topping onto the dough in spoonsful then smooth over the top with a spatula
Bake for 40-45 minutes
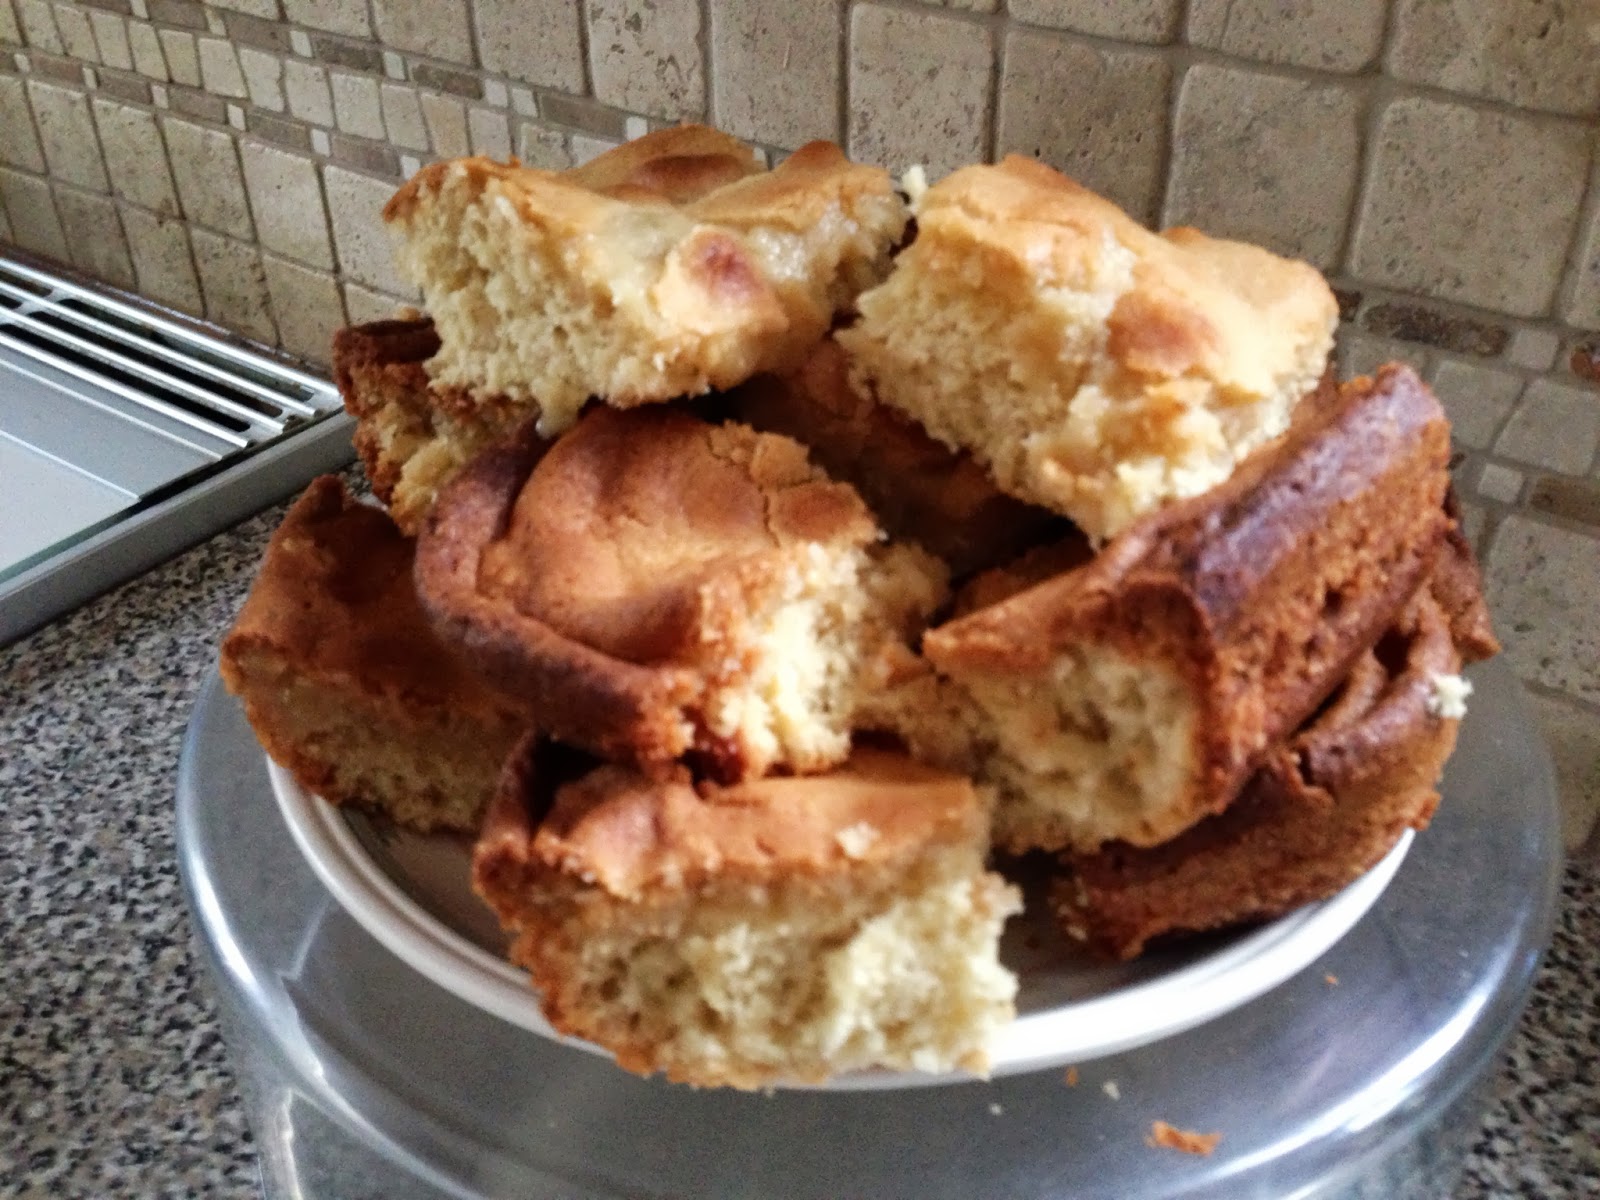
The cake will have a golden brown top but the middle will be runny


Place your pan onto a wire rack to cool then cut up as desired
This cake is best eaten on the day but should last a day in an airtight container at room temperature


Saturday 18 May 2013

Soft rotis

Last weekend we had my friends from work round for lunch so that my wife could put faces to the names she keeps hearing apart from the enjoyment of good food and good company.
The menu was jerk chicken, lamb carry, and rice and peas.  Because the lamb carry generates a lot of lovely sauce we needed something to mop it all up so a little research on line came up with a recipe for rotis.  Rotis are a flat bread like chapattis and are very popular in the Caribbean where they are used like tortillas and wrapped around savoury fillings.  Mine were a little irregular in shape for that but served the purpose perfectly and tasted delicious.  They will definitely be making another appearance on the menu.  This recipe made 12 rotis.

SOFT ROTIS
 

  • 350g plain flour
  • 1 tbsp. butter, melted
  • 1/2 tsp salt
  • 2 tbsp. vegetable oil
  • 250ml boiling water, straight from the kettle
Put the flour into a bowl with the salt.  Stir in the oil followed by the hot water.  Bring together with a tablespoon because it will be hot.  Flour your worktop then tip out the mixture and knead until it forms a soft pliable dough.  This could take up to five minutes and the dough will absorb a lot of flour from the surface so keep it to hand to stop it sticking.  It should look like this or better.

 
Once you reach this stage let the dough rest under the upturned bowl for five minutes whilst you melt the butter and heat a heavy non-stick frying pan.  Heat it on a low heat till you're ready then turn it up.
Roll out the dough into a large thin circle shape and brush all over with the melted butter.


Roll the dough up towards you so that you have a long even snake like shape


And then cut it into twelve even pieces


Take one of the pieces and roll it into a ball.  Place the ball onto the work surface and with the palm of your hand flatten it into a circle then roll it out into your roti. 
Dry cook your roti in the hot pan.  After 10 seconds turn it over and cook until bubbles start to form then flip it over and finish off the first side.  The brown patches are a desired finish but try to get as much flour off them as you cab before they go in because the excess flour will burn and stinks!
Put your cooked rotis onto a plate and cover with a clean tea towel.  Mine kept warm and soft for an hour.


Saturday 11 May 2013

Swiss buns

Everybody loves a sticky bun and today I tried making them for the first time.  This is a really easy recipe and judging by my family's reactions they were another success.  The making is really easy, just make sure you have plenty of time to spare for the proving which will take at least 2 hours.  This is definitely a recipe for a day off but they do taste as good as they look.

SWISS BUNS
 
 
  • 250g strong white flour
  • 250g plain flour
  • 7g sachet of dried yeast
  • 2 tsp of fine salt not coarse
  • 50g butter, softened
  • 2 tbsp. caster sugar
  • 100ml milk, warmed
  • 1 egg
  • 200ml tepid water
 
Sift the flours into a large bowl with the yeast and salt.  Make a well in the centre then add the butter, sugar, milk and egg.
Bring the ingredients together with a wooden spoon adding the tepid water a little at a time till you have a soft wet dough
Turn out onto a floured surface and knead well for ten minutes till smooth and elastic - the dough will absorb quite a bit more flour as you keep the surface floured
Transfer the dough to a lightly oiled clean bowl, cover with a tea towel and put in a warm place to rise to double its size.
 

Mine spent nearly 2 hours in the airing cupboard and came out like this


Knock the air out of the dough, cut it into twelve pieces and make them into your buns.  As you see I'm not good at making bun shapes!  Put them onto a lined baking tray and loosely cover with cling film


Put them back into your warm place for another hour or so until the buns have doubled in size.
About 20 minutes before you're ready to bake them preheat the oven to 200C/400F/Gas 6


Bake in the oven till cooked and golden.  Mine took 10 minutes.


Allow to cool on a rack and then ice as desired.  I made a simple icing with 300g of icing sugar and four tablespoons of water and it generously iced all twelve.  Try replacing the water with lemon juice for a sharper icing. 


Sunday 5 May 2013

Lamb casserole with feta dumplings

We made a rare visit to McDonalds this weekend for something quick to eat and sampled their limited edition Louisiana barbecue burger.  What can I say?  Cardboard with barbecue sauce, won't be going back for a long time.  Full marks for the chocolate brownie McFlurry, though, that was really good.

In these times of austerity its always nice to have a recipe that uses mince and goes a long way.  Today I made a Greek inspired lamb casserole with feta cheese and dumplings would generously feed at least six and maybe even ten people and features the easiest dumplings ever.  I am also thinking of trying this with a beef mince base with tomato puree streaked through the dumplings and mozzarella cheese on top.  See what you think...

LAMB CASSEROLE WITH FETA DUMPLINGS
 

FILLING
  • a little oil
  • 450g good lamb mince
  • 1 onion, finely diced
  • 1 carrot, finely diced
  • 1 clove garlic, crushed (or a 1 tsp lazy garlic)
  • 1 tsp cinnamon
  • 1 tbsp. tomato puree
  • rosemary
  • 200ml red wine
  • 200ml strong beef or game stock
TOPPING

  • 225g plain flour
  • 3 tbsp. baking powder
  • pinch of salt
  • 100g butter, diced
  • 175ml soured cream or yoghurt
  • 150g feta cheese
Heat a little oil in a good heavy based pan and brown the mince.  Remove from the pan.
In the same pan fry the onion, carrot and garlic gently till softened but not browned
Add the mince back with the cinnamon and tomato puree and cook for 4-5 minutes
Add the rosemary, stock, wine and seasoning and bring to the boil.
Allow to simmer for 30 minutes

Preheat the oven to 200C/Gas 6

In a blender pulse together the dry ingredients with the butter till it look like breadcrumbs
Add the sour cream of yoghurt and do the same again.  The dough will be sticky.
Put the filling into a baking dish or a couple of small ones and top with lumps of dough.


Crumble over the feta cheese.  If feta is too salty Wensleydale might be a good alternative


Bake for 25 minutes until crisp and golden and serve with your choice of vegetables


Wednesday 1 May 2013

Bagels

Last week I collected the bread making cards given away by the Daily Mail and one of them was how to make bagels.  The big question is, why bother?  They only cost a pound a bag in Tesco and Asda and they are not the simplest thing to make.  My youngest son answered that question when he said, 'You bother dad because they taste bloody delicious.'  So good in fact that no one toasted them, they tasted so good as they were with that wonderful chewiness you come to expect.  Here then is the recipe, if you're going to be in all morning give them a go.  They won't look quite as perfect as shop bought ones but isn't that one of the joys of home baking?

BAGELS

  • 500g strong white bread flour
  • 2 tsp salt
  • 4 tsp sugar
  • 25g butter, softened and finely chopped
  • 3g (1 tsp) dried active yeast or instant yeast
  • 240ml warm water
  • 1 egg, beaten
  • 1 tsp salt
  • another egg beaten with a pinch of salt for the egg wash
In a medium sized bowl mix the flour, 2 tsp salt, sugar and butter and put aside
In a large bowl put the yeast and add the water, stir until the yeast dissolves then stir in the egg
Tip the dry mixture into the wet mixture and stir with a wooden spoon till well combined
Leave the dough in the bowl and put the medium bowl upturned over it then leave for ten minutes

To knead: leave the dough in the bowl, stretch a portion of the dough up from the side and press it into the middle.  Move the bowl round a little and repeat.  Do this a further eight times, it should only take about ten seconds.  Recover with the over bowl and rest for ten minutes.  Repeat this another three times and it should look like this.


After the final kneading cover the dough with again and place in a warm place to rise until it has doubles in size.  Mine took an hour and a half in the airing cupboard.  When it is ready put a half full 2 litre saucepan of water on to boil with a teaspoon of salt in it.  Preheat the oven to 260C/475F/Gas 9 or as high as your oven will go.

 
When the dough has doubled in size punch it down to release the air and turn out onto a lightly floured work surface.  Roll the dough into an even log.  Cut it into nine even sized pieces.  Roll each piece into a ball.  Take each ball and carefully push a hole through the middle with your finger and work into a ring shape.  Place them onto a baking tray covered with baking paper and cover them with lightly oiled cling film.


Cook the bagels in batches of three in the boiling water.  When they start to puff up and float to the surface turn them over and boil for five minutes.  Remove from the water and allow to dry and cool slightly.


Put a roasting pan in the bottom of the oven with a cup of water in it.
Turn down the oven to 200C/400F/Gas 6
Brush the bagels with the egg wash and bake till golden brown.  To check if they're ready turn one over and tap it, if it sounds hollow then its done.  Mine took about twenty five minutes but check after fifteen.
When done set on a wire rack to cool.